
You usually realise a file's gone at the worst possible moment, when the board pack is due, the finance export has vanished, or someone has emptied the wrong folder and kept working. Don't reach for recovery software first. Stop writing to the device, identify what you've lost, and treat the job like a small incident, not a quick click-and-fix.
The difference between a clean recovery and a lost cause is usually discipline, not luck. UK guidance is clear on that point, preserve the original, verify integrity, keep copies separate, and document what you do. The National Archives says organisations should identify file formats, keep virus-free master copies, run fixity checks, use DROID with PRONOM, and keep at least two copies of digital records so one can be worked on while the other stays untouched National Archives digital preservation guidance.
Table of Contents
- The First Five Minutes After You Lose a File
- Recovering Files on Windows and OneDrive
- Recovering Files on macOS
- Linux, External Drives, and Failing Media
- Recovery Tools Worth Your Time
- When to Stop and Call a Professional
- Stop Losing Files in the First Place
The First Five Minutes After You Lose a File
The first move is boring and correct, which is exactly why people skip it. Stop using the affected drive immediately, and if it's an external device, eject it properly and disconnect it. Every write, even a harmless-looking temp file, can overwrite the deleted blocks you want back.
Take photos of the error message, the drive label, and any strange sounds. If the drive is clicking, buzzing, or beeping, that is not a software problem, it's a hardware warning. Keep the exact file path, the last time someone remembers opening the file, and who was using the machine when it disappeared.
Check the file system before you do anything else. NTFS, APFS, ext4, and exFAT behave differently, and that matters when you choose whether to use built-in recovery, clone first, or bring in a specialist. If the data sits under UK GDPR, FCA records rules, or NHS DSPT controls, assume you may need a forensic image before touching the source.
Practical rule: if the file matters to finance, legal, or regulated operations, don't improvise. Preserve first, recover second.
Work out whether the drive is still usable or already failing. If the device is slow, disconnecting, or showing read errors, you're out of the easy window and into imaging territory. At that point, a managed service provider or recovery lab is the sensible call, not a second round of hopeful clicking.
For a quick companion checklist, how to recover deleted files gives a simple user-level rundown, but use it only after you've stopped writing to the device. And before anyone starts poking around in support tickets, keep what to do before calling IT support handy so the incident starts cleanly.
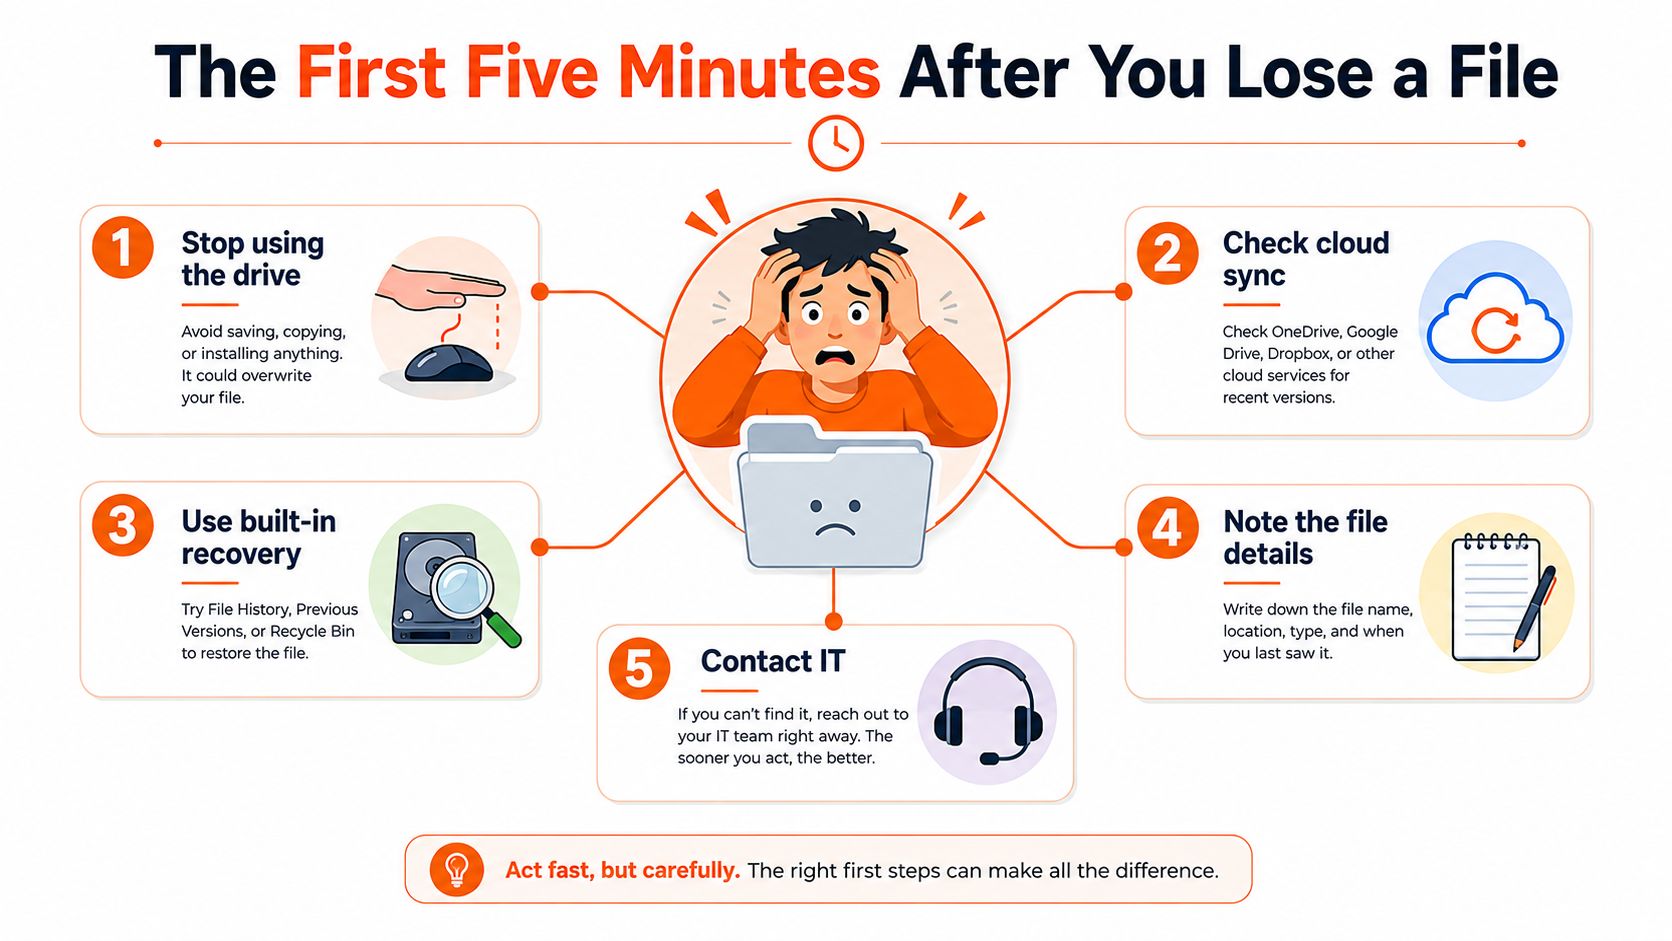
Tape this checklist next to the helpdesk phone:
- Stop using the drive. Unplug external media and tell staff not to save anything else to the machine.
- Check cloud sync. Confirm whether OneDrive, iCloud Drive, or another sync client still has a copy.
- Use built-in recovery. Try the Recycle Bin, File History, Previous Versions, or Trash before paid software.
- Note the file details. Save the path, filename, extension, last modified time, and any error text.
- Contact IT. Escalate quickly if the drive is failing, encrypted, or linked to regulated data.
Recovering Files on Windows and OneDrive
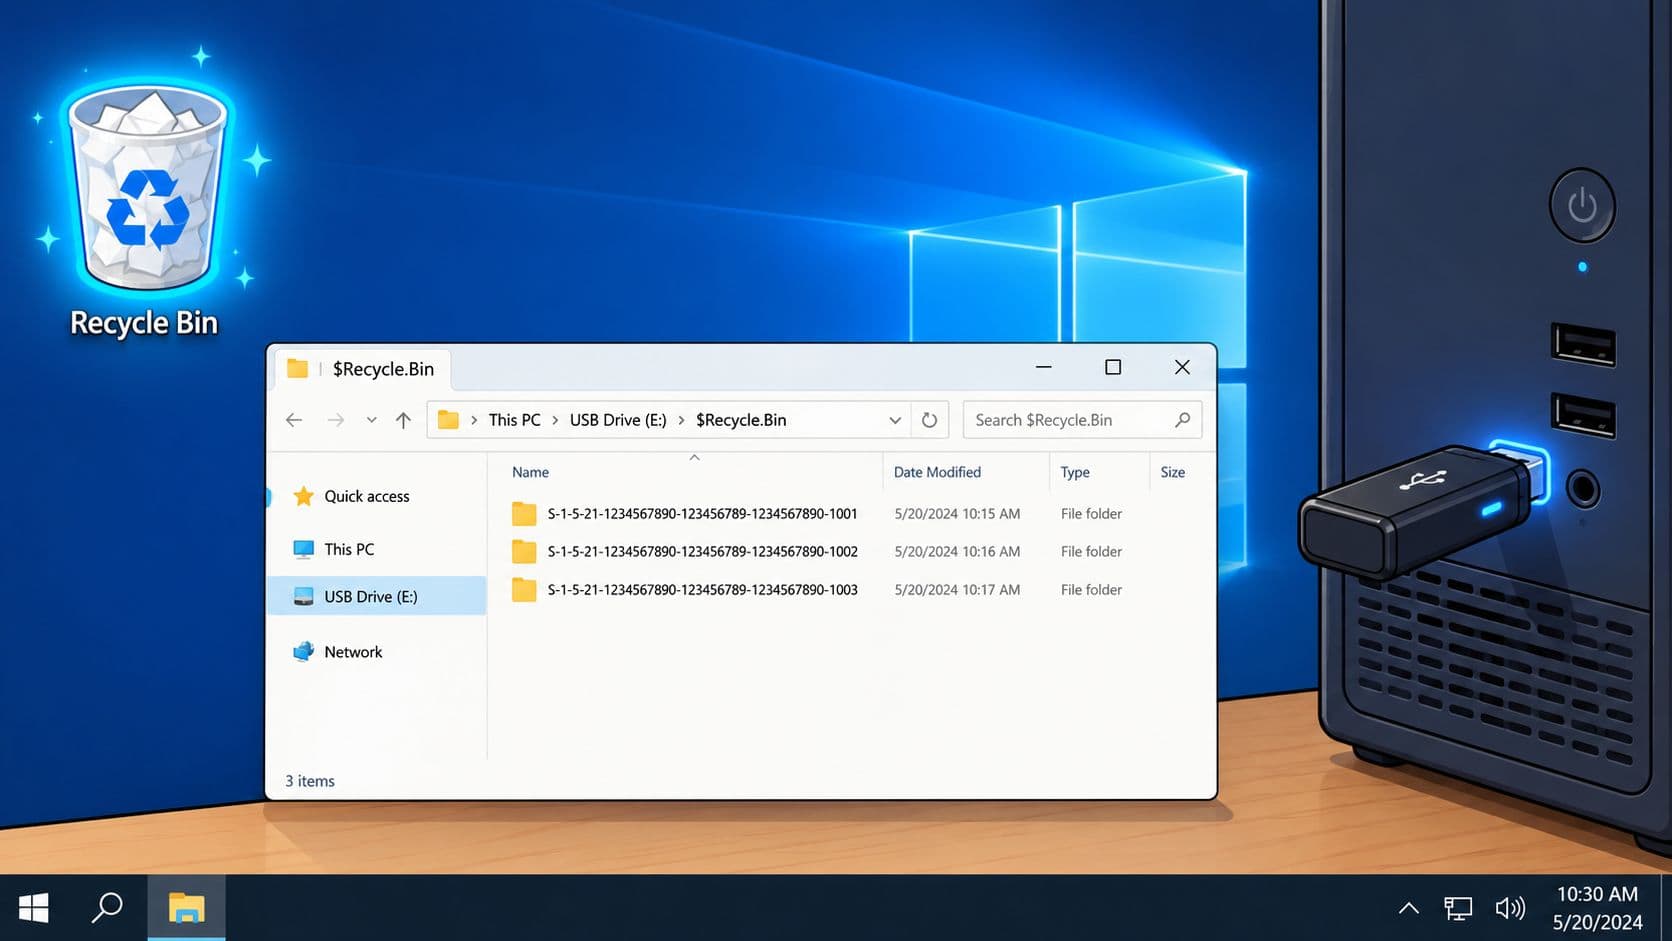
Windows recovery starts with the obvious places people forget in a panic. Check the Recycle Bin first, then look for files deleted from external drives that may have bypassed the bin and landed in the hidden $Recycle.Bin structure. If the file is there, restore it from the original location rather than copying it somewhere new.
If that fails, go to File History. In Windows, the path lives under Settings, System, Storage, Advanced, Backup options, but most SMEs only discover it was never switched on after the loss. When it is enabled, it can restore earlier versions of files and folders without touching the live copy.
Previous Versions comes next. Right-click the folder or file, open Properties, then use Restore Previous Versions if Volume Shadow Copy has a snapshot to offer. That route is useful on traditional Windows volumes, but it won't save you on every SSD, on FAT32 media, or on cloud-only content that never had a local snapshot.
For Microsoft 365 content, go to OneDrive recycle bin at my.onedrive.com first. Personal users get a standard recycle bin, while Microsoft 365 admins can reach the second-stage recycle path for longer retention when tenant settings allow it. Shared documents are a different animal, because SharePoint and Teams files sit in site recycle bins and may also need a compliance-centre path, so don't waste time looking only in OneDrive if the file was collaborative.
After you've done the quick checks, decide whether native tools are enough. They usually are if the file was deleted recently, the drive is healthy, and the user kept working in the same Microsoft 365 tenant. If the partition is corrupt, the disk is unreadable, or the file was deleted from an encrypted volume, move to a scanner or imaging tool rather than clicking around and hoping.
A useful way to think about the Windows stack is to match the recovery path to the storage layer. SharePoint versus OneDrive matters here because shared workspace files and personal files don't follow the same restoration route, and teams waste hours by checking the wrong vault.
Recovering Files on macOS
Mac recovery starts in Trash, but the detail that catches Windows-trained admins is the hidden ~/.Trash folder per volume. If a user dragged something off a network share, it may have bypassed Trash entirely, which is why so many Mac tickets in agencies start with, “I deleted it, but Trash is empty.”
Time Machine is the answer when it exists and is healthy. Confirm the backup drive is attached, open Time Machine, and use the timeline on the right edge to step back to the point before the mistake. If the backup disk isn't connected, APFS local snapshots can still save you, because macOS keeps snapshots on the internal drive and Apple calls that Local Snapshots.
iCloud Drive needs a different check. Files deleted from iCloud Drive may sit in Recently Deleted for a limited period, but only treat that path as authoritative if iCloud Drive is the source of truth. If the Mac itself held the only clean copy and sync has already propagated the deletion, you're looking at a restore problem, not a cloud browsing problem.
If the startup disk is gone, don't keep rebooting and guessing. Go straight to recovery, inspect the disk, then restore from backup.
For a dead or corrupted startup volume, use Recovery Mode by holding Command-R on Apple Silicon or Intel Macs, then open Disk Utility and run First Aid before attempting a restore. That sequence matters because FileVault can complicate imaging, Gatekeeper can block unsigned tools, and APFS cloning can confuse people who think every copied file is a simple duplicate.
The Mac rule is simple. If the copy exists in Trash, Time Machine, or iCloud Drive, use the built-in path first. If the disk is failing or FileVault is locked, stop treating it like a desktop admin task and treat it like storage recovery.
Linux, External Drives, and Failing Media
Linux and removable media belong in the same conversation because the decision tree is the same, preserve the device or you'll make the damage worse. Start with smartctl -a /dev/sdX and read the SMART attributes before anything else. Reallocated sectors, pending counts, or read errors mean image first, scan later.
If the disk is still readable, clone it with ddrescue into a larger destination and keep the logfile mode on so you can resume after an interruption. That's the correct move for USB drives, old spinning disks, and scratched media that's starting to wobble. Mount recovery targets read-only with mount -o ro so you don't create fresh damage while searching.
For ext4, TestDisk can rebuild lost partitions and PhotoRec can carve files by signature when the filesystem is too broken to trust. For NTFS external drives attached to Linux, ntfsundelete is worth a look if the MFT still has useful entries. For XFS, btrfs, and ZFS, use snapshot recovery if the volume was already protected, because snapshot rollback beats carving almost every time.
Don't run
fsckon a drive that's clicking. That's a hardware failure until proven otherwise.
The hard decision is this, noisy drive or rising SMART errors means stop, power down, and move to professional handling. A cleanroom isn't overkill when the media is physically failing, it's the only place where the odds stay acceptable. If you keep writing to a dying disk, you're not being thorough, you're finishing it off.
Recovery Tools Worth Your Time
I'd rather see an SME keep four tools straight than install twelve and use none well. The right mix is simple, Recuva for basic deleted-file recovery on healthy Windows media, TestDisk and PhotoRec for deeper low-level work, Disk Drill for a friendlier cross-platform GUI, and R-Studio when the problem is messy enough to justify a serious licence. For a broader selection of backup and restore planning, best business backup solutions for SMEs is the right companion reading.
| Recovery Tools at a Glance | Best For | Platform | Cost | Weakness | Our Verdict |
|---|---|---|---|---|---|
| Recuva | Accidental deletion on healthy NTFS or FAT media | Windows | Free basic build | Struggles with RAID, badly corrupted partitions, and encrypted volumes | Keep it on technician laptops |
| TestDisk / PhotoRec | Partition repair and signature-based recovery | Windows, macOS, Linux | Free | No polished UI, steeper learning curve | Essential for technical staff |
| Disk Drill | Friendly ad-hoc recovery with byte-level backup options | Windows, macOS | Paid | Not ideal for repeated incident work | Good standard GUI for mixed estates |
| R-Studio | RAID rebuilds, damaged NTFS, APFS, HFS+, image-based scanning | Windows, macOS, Linux | Paid | More complex than casual tools | Buy this centrally if downtime hurts |
The pattern I recommend is blunt. Keep Recuva and TestDisk on every technician's USB stick, standardise Disk Drill for Mac-friendly recovery if your team likes a GUI, and license R-Studio centrally for the cases that cost money. That avoids training chaos and cuts the urge to install random freeware in the middle of an incident.
Blowfish Technology's managed backup with automated recovery testing and granular restore for files and folders fits this same logic, because recovery only works when the restore process has already been exercised. If the backup exists but no one has rehearsed the restore, you don't have resilience, you have a hope.
When to Stop and Call a Professional
A drive that clicks, buzzes, or beeps is already telling you it is failing. If a RAID array has lost a disk, if ransomware has hit a server or shared drive, if someone has formatted a database volume, or if an SSD firmware fault has landed on a business-critical machine, stop using it. Every extra read can make recovery harder and more expensive.
The failure modes are predictable. A dying drive gets worse when you keep reading it. A RAID rebuild without a spare can take the rest of the array down with it. A mapped backup share can be encrypted by the same ransomware that hit the live data, so your restore target gets wrecked too.
A proper UK recovery lab or MSP should be able to show cleanroom access, a written non-disclosure agreement, a clear no recovery verdict when the data is gone, and pricing based on imaging work rather than a vague flat fee. That is the standard worth paying for when the data has operational, legal, or contractual weight.
Treat the incident as a business decision. Compare engineer hours, the value of the lost information, any UK GDPR reporting exposure, and the SLA tied to the service. If the data matters to payroll, finance close, customer delivery, or regulated records, hand the incident to someone who handles this all day.
Keep the NCSC incident response guidance and the Cyber Security: Small Business Guide ready for whoever takes over. Those documents help the responder act quickly without guessing, which is exactly what you want when pressure is already high.
Stop Losing Files in the First Place
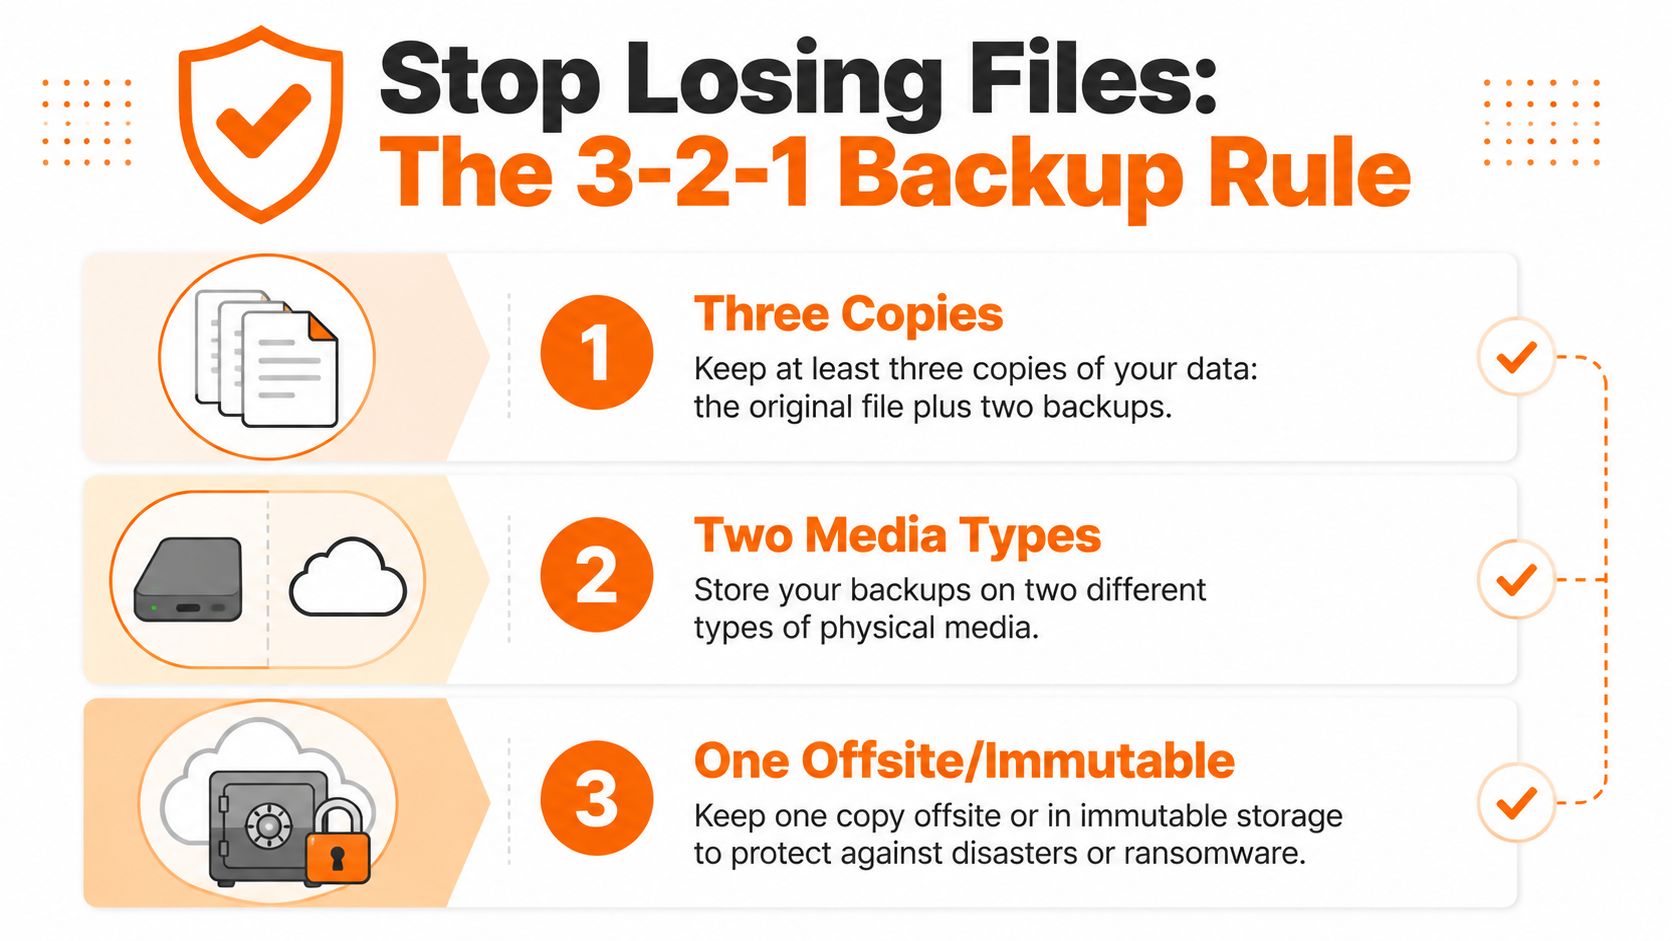
The 3-2-1 rule still wins because it is simple enough to execute and strict enough to matter. Keep three copies, on two media types, with one offsite or immutable. In practice, that can mean Microsoft 365 retention policies, immutable object storage, a NAS with snapshots replicated elsewhere, or another arrangement that keeps the backup copy separate from the live estate.
What matters next is RTO and RPO. Pick the maximum downtime you can tolerate and the amount of data you can afford to lose, then set your backup frequency and restore design around those limits. A finance folder and a brochure archive should not share the same recovery target.
Build ransomware resistance into the backup plan itself. That means EDR with rollback where it fits, MFA on cloud accounts, offline or immutable copies, and regular restore tests that prove the backup is restorable. The NCSC says backups should be tested, kept offline or separate from the network, and scanned before restoration because ransomware can infect backup sets too NCSC ransomware prevention and recovery guidance.
If you need a blueprint for the wider disaster side of this, how to create a disaster recovery plan is a useful external reference point, but the plan only works when someone owns it and tests it. A recovery document that nobody has opened since last year is just stationery.
For a practical one-page pre-incident handoff, keep this in place:
- Contact tree. Name who gets called first, second, and third.
- Credentials vault. Store admin access, vault access, and emergency recovery credentials securely.
- Recovery runbook. Write down the restore order for file shares, cloud content, and critical apps.
- Logging standard. Keep incident notes aligned to NCSC-style evidence collection.
- Restore test schedule. Make one person accountable for proving backups still work.
If you want a team that handles file recovery as part of a wider resilience stack, speak to Blowfish Technology. We design backup and recovery around tested restores, not optimistic assumptions, and we'll help you build a setup that gives you a real path back when a file goes missing.

The Blowfish Technology team. Managed IT, cloud services, software development and connectivity for North West businesses since 1999.